Scrap Happy: Heart Mug Rug
As I started sorting all of my scraps into something manageable I decided I needed to start using them for things that I have always thought about making but never had the time to sort through all the scraps. With the scraps nicely sorted and cut into usable pieces I can now easily find what I need to get the the part I love most of all, the creating. I am going to dedicate a series of blog posts to Scrap Happy projects. I don’t know how many posts I will make for this series or how long it will last, but I hope you enjoy it and are inspired to make some things along the way.
Scrappy Fabric Mug Rug
By Carolyn King
Finished Size approximately 5 ½” X 5 ½”
Before cutting and sewing please read all instructions to familiarize yourself with the pattern.
Materials Needed:
For each mug rug you will need:
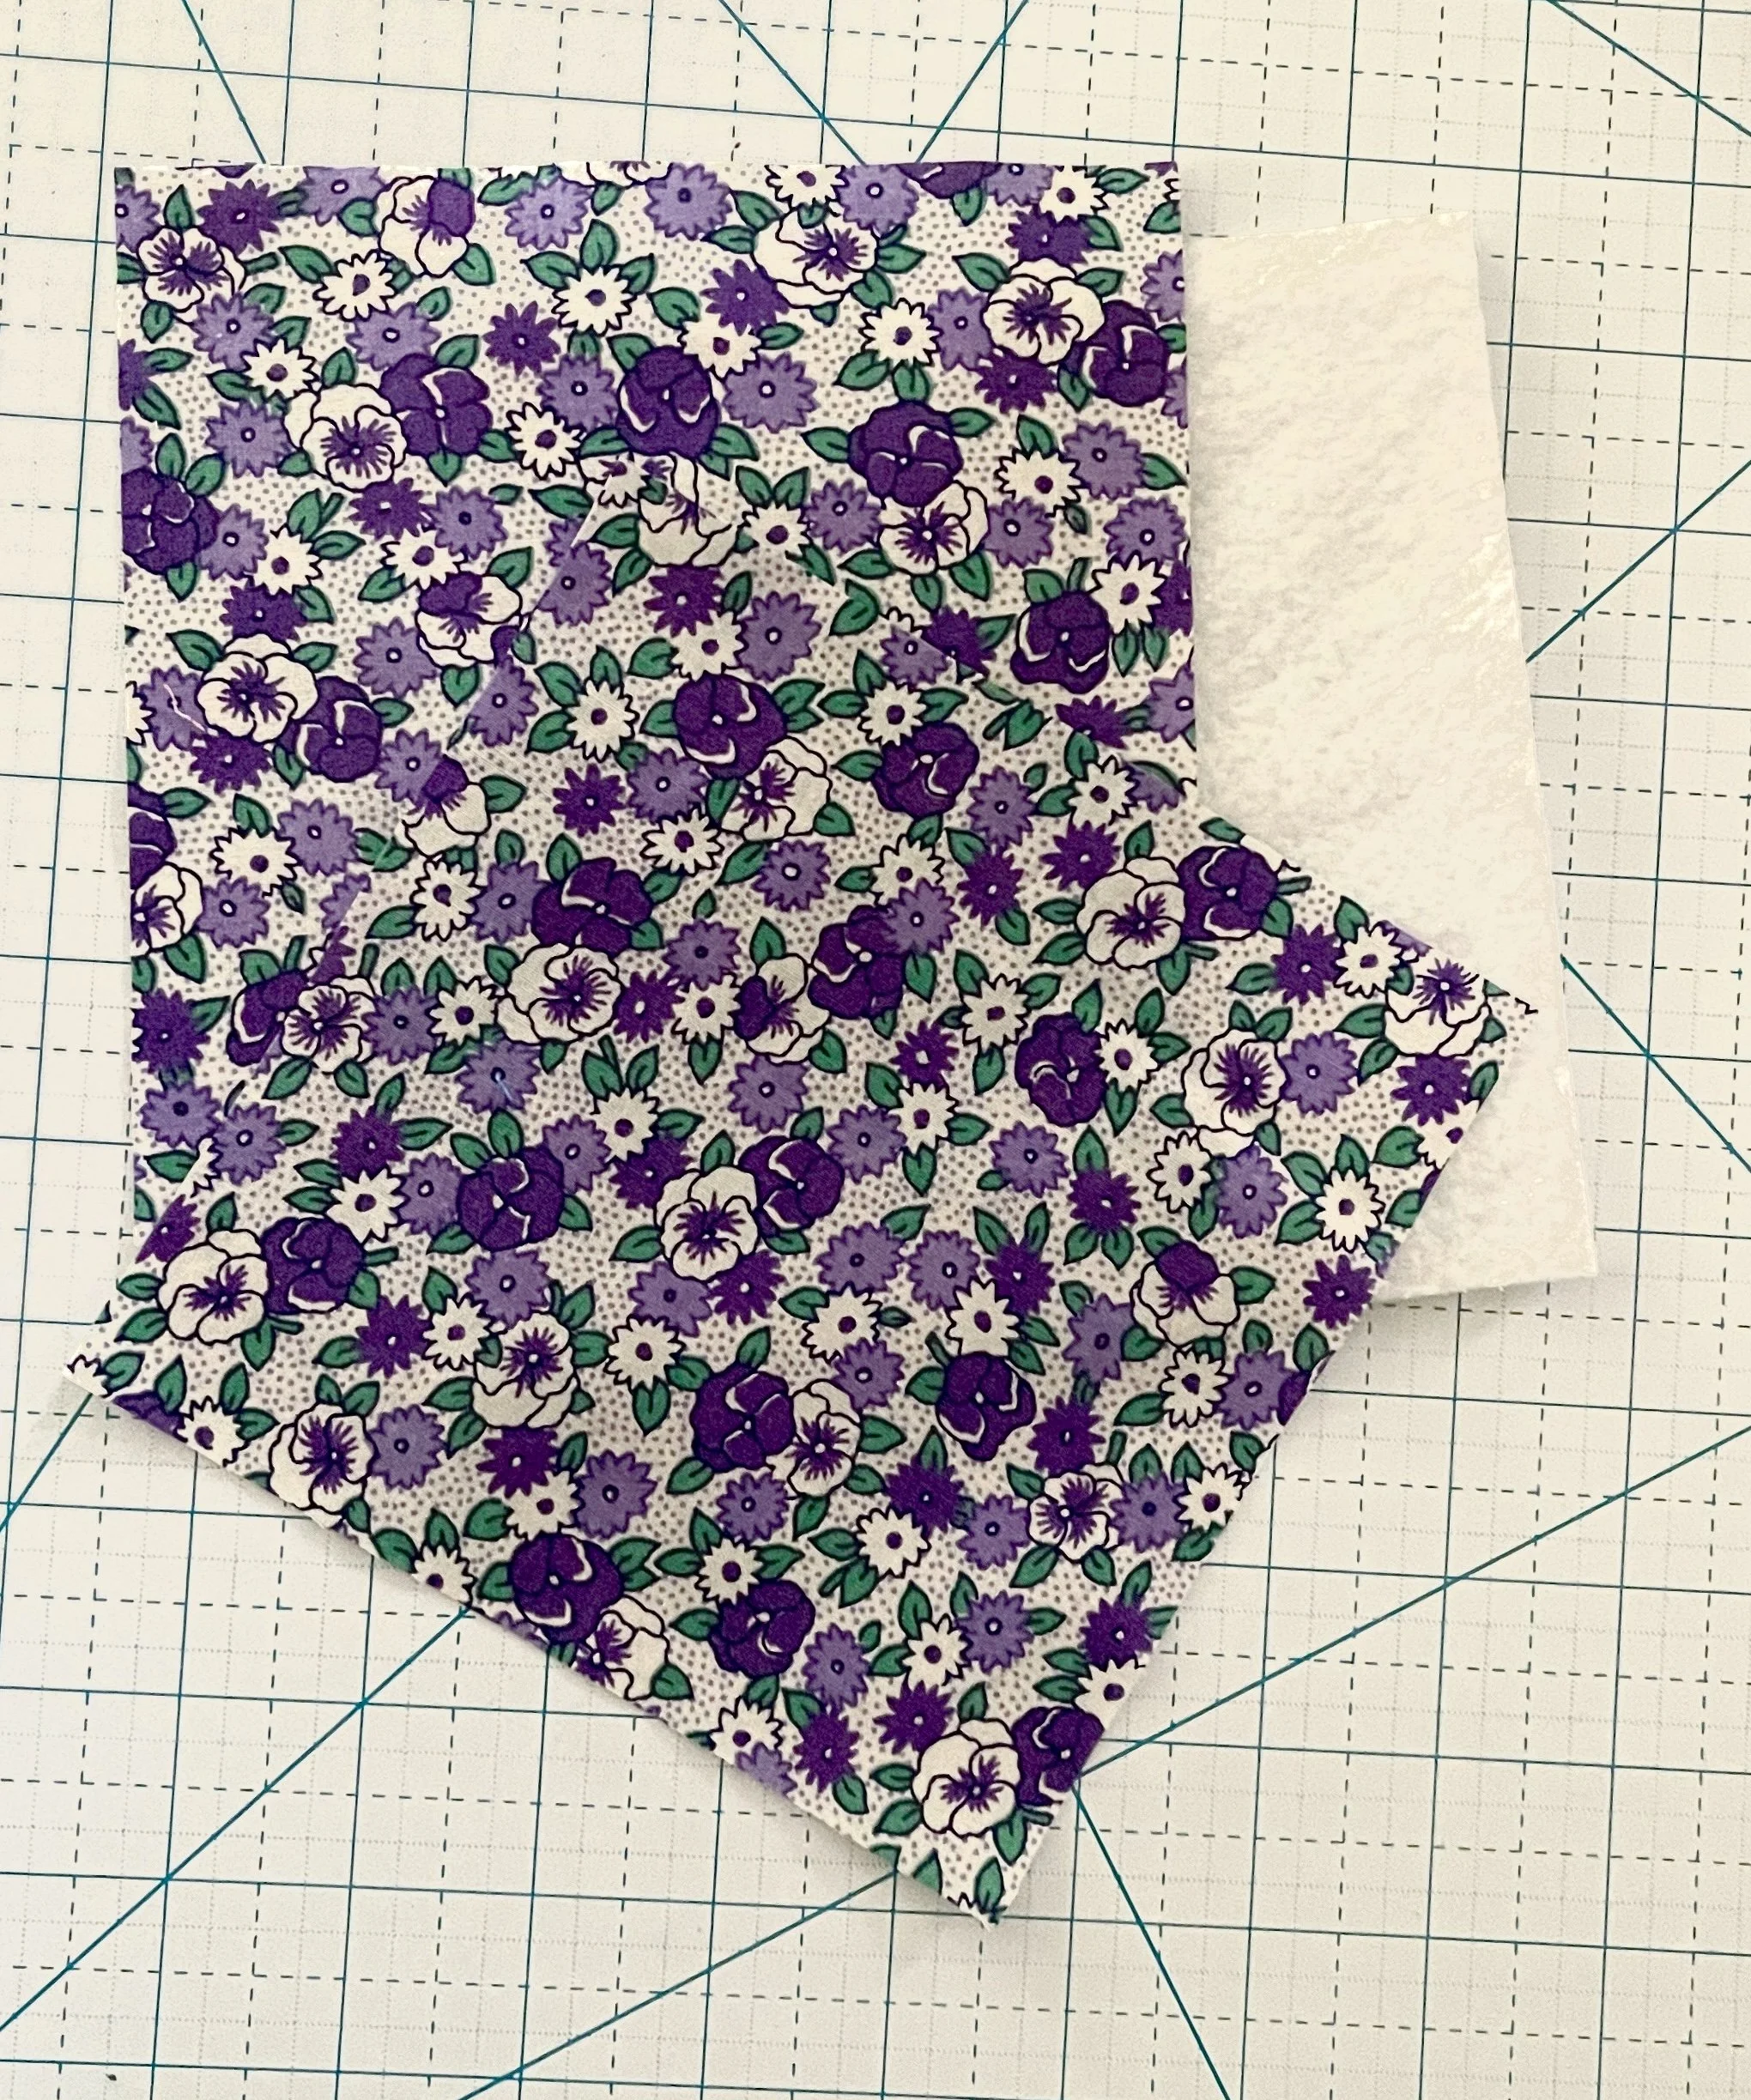
(2) 6” squares of cotton fabric
(1) 6” square of cotton batting or fusible fleece
(1) heart template (see below)
Instructions:
1 Choose your fabric. It can be two pieces of the same fabric or different fabrics.

I was making lots of heart mug rugs for a luncheon at church. These are just some of the fabrics I cut out.
2 Cut (2) 6” squares from your fabric and (1) 6” square from your batting or fusible fleece. If using fusible fleece or batting, fuse it on the wrong side of 1 piece of your cotton fabric.
3 Trace the heart shape onto 1 piece of fabric.
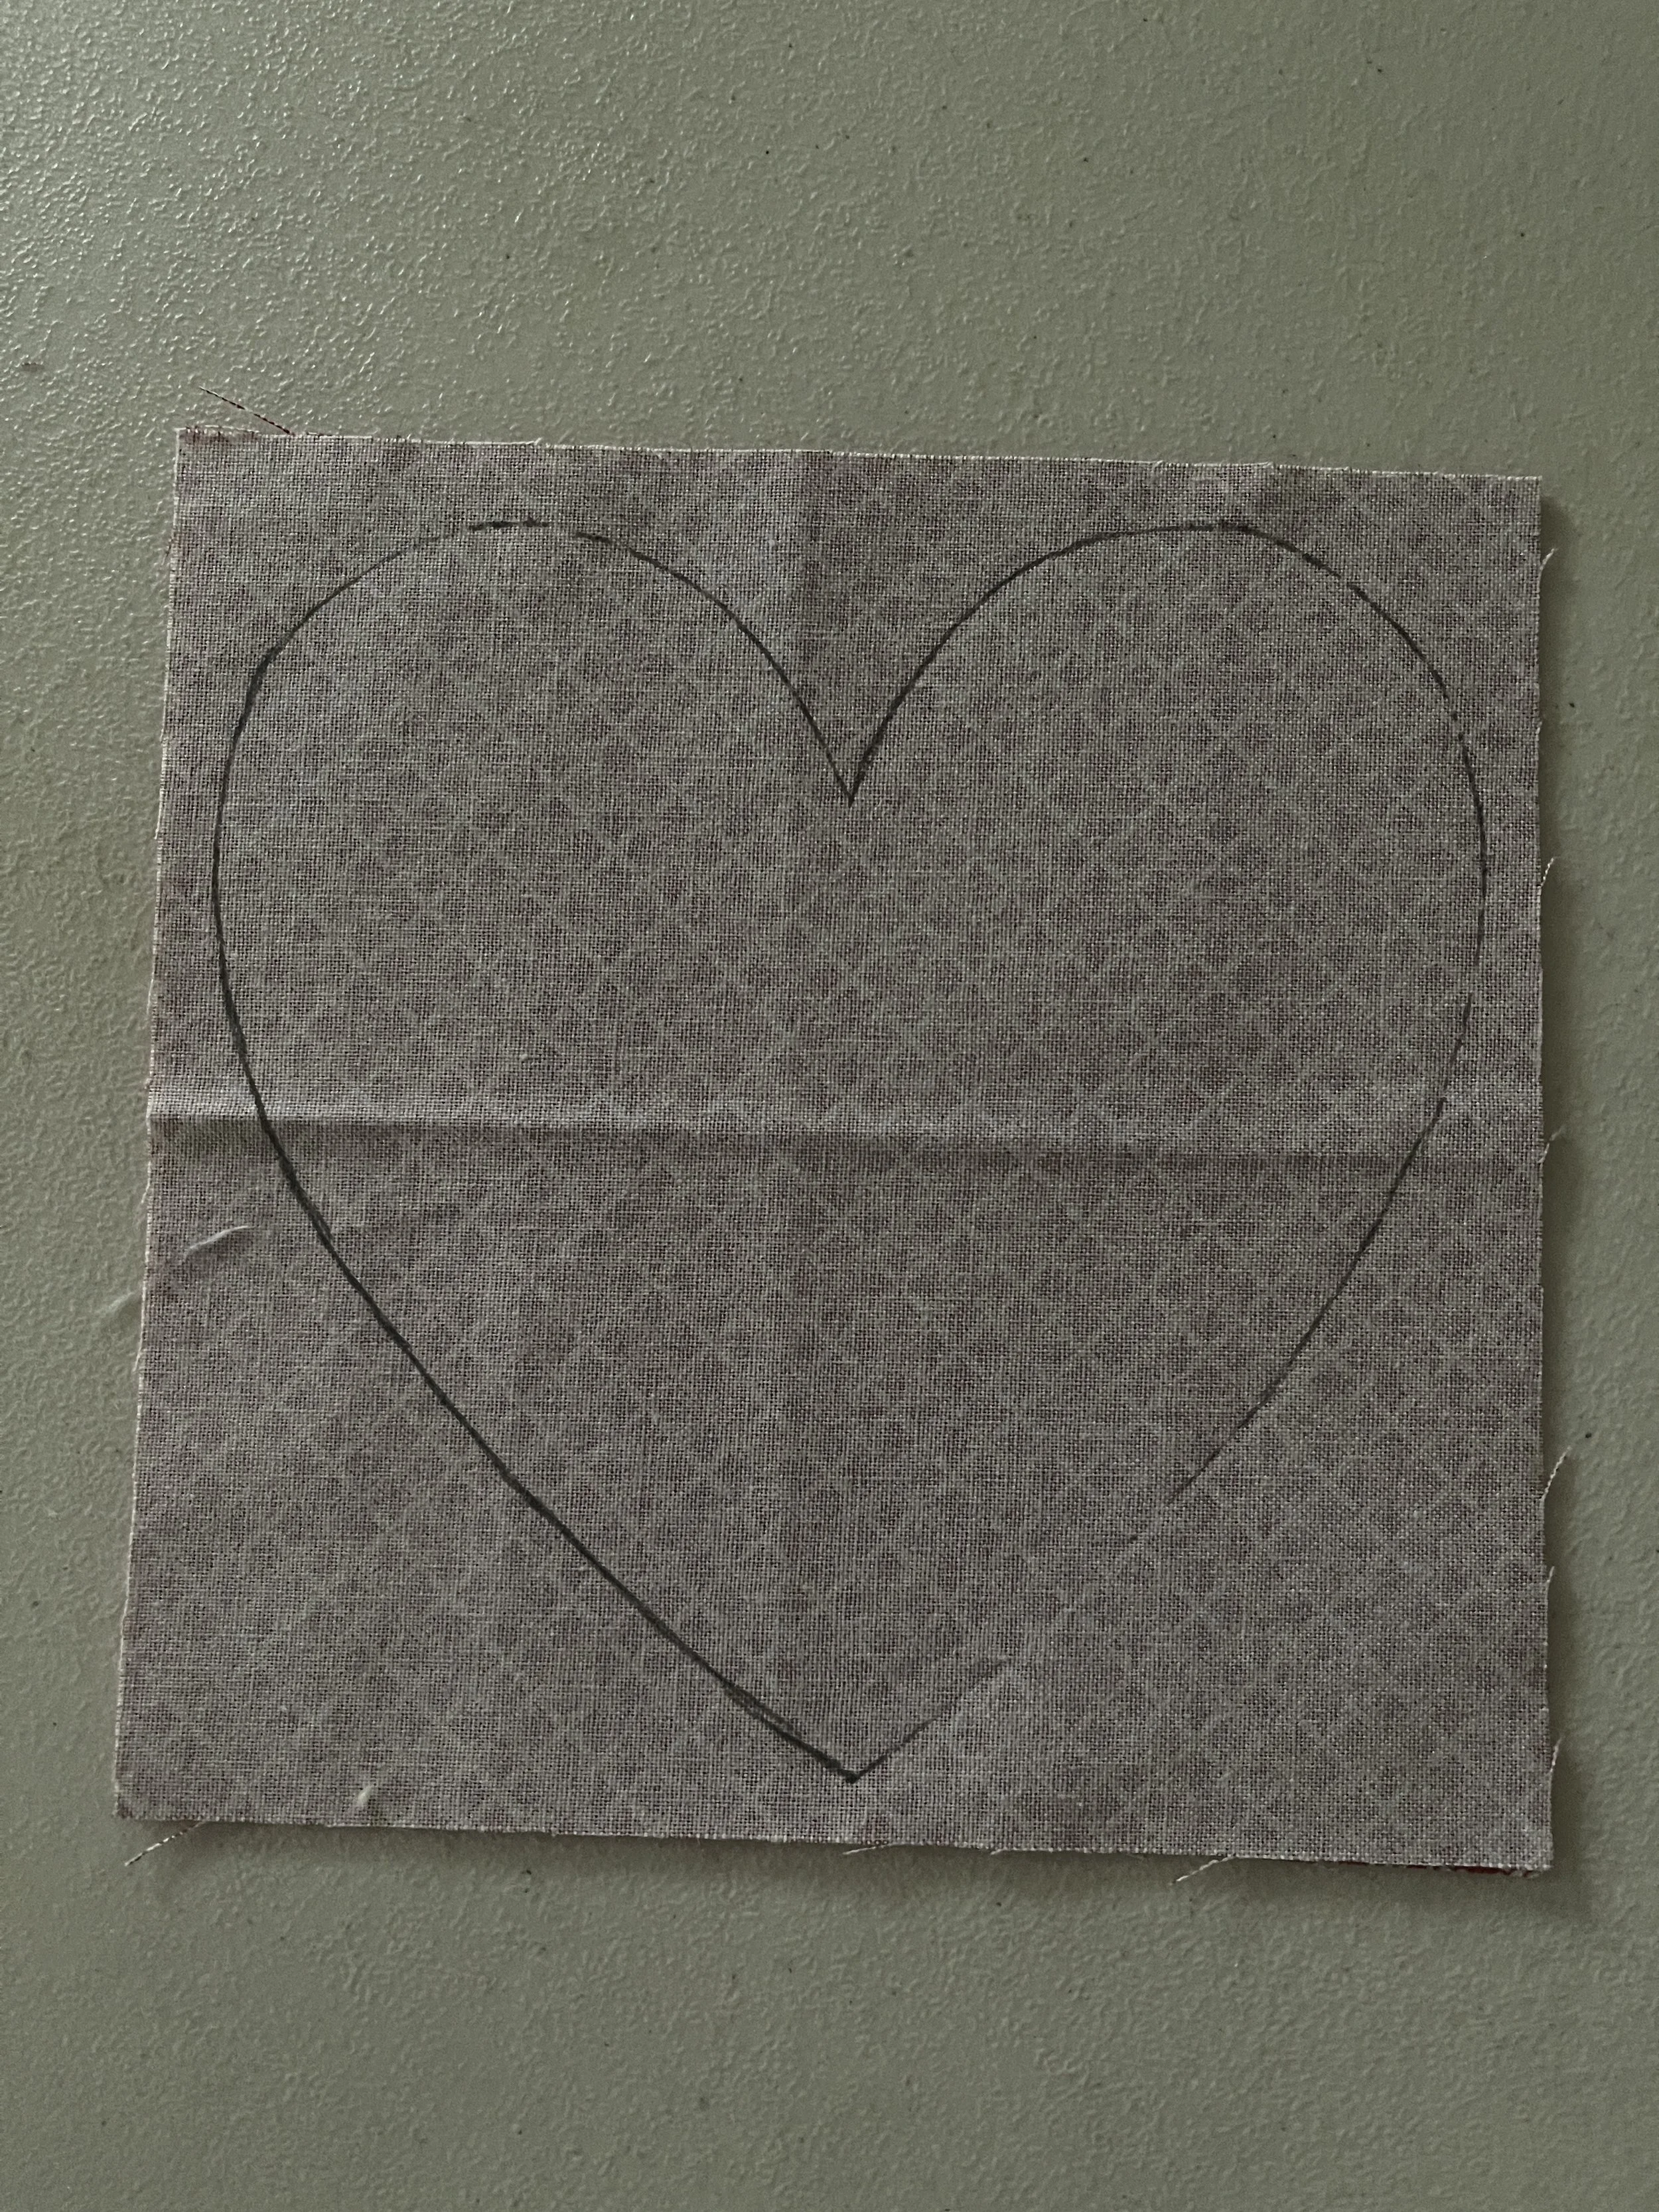
a. Trace on the right side of fabric if you are turning your heart inside out for a finished edge.
b. Trace on the wrong side of fabric if you are you are creating a heart with a raw edge.
Directions for a finished edge heart:
4 Place right sides together of the cotton fabric. If using batting that is not fused, layer it on the bottom. The fabric with the traced heart should be on top facing you.
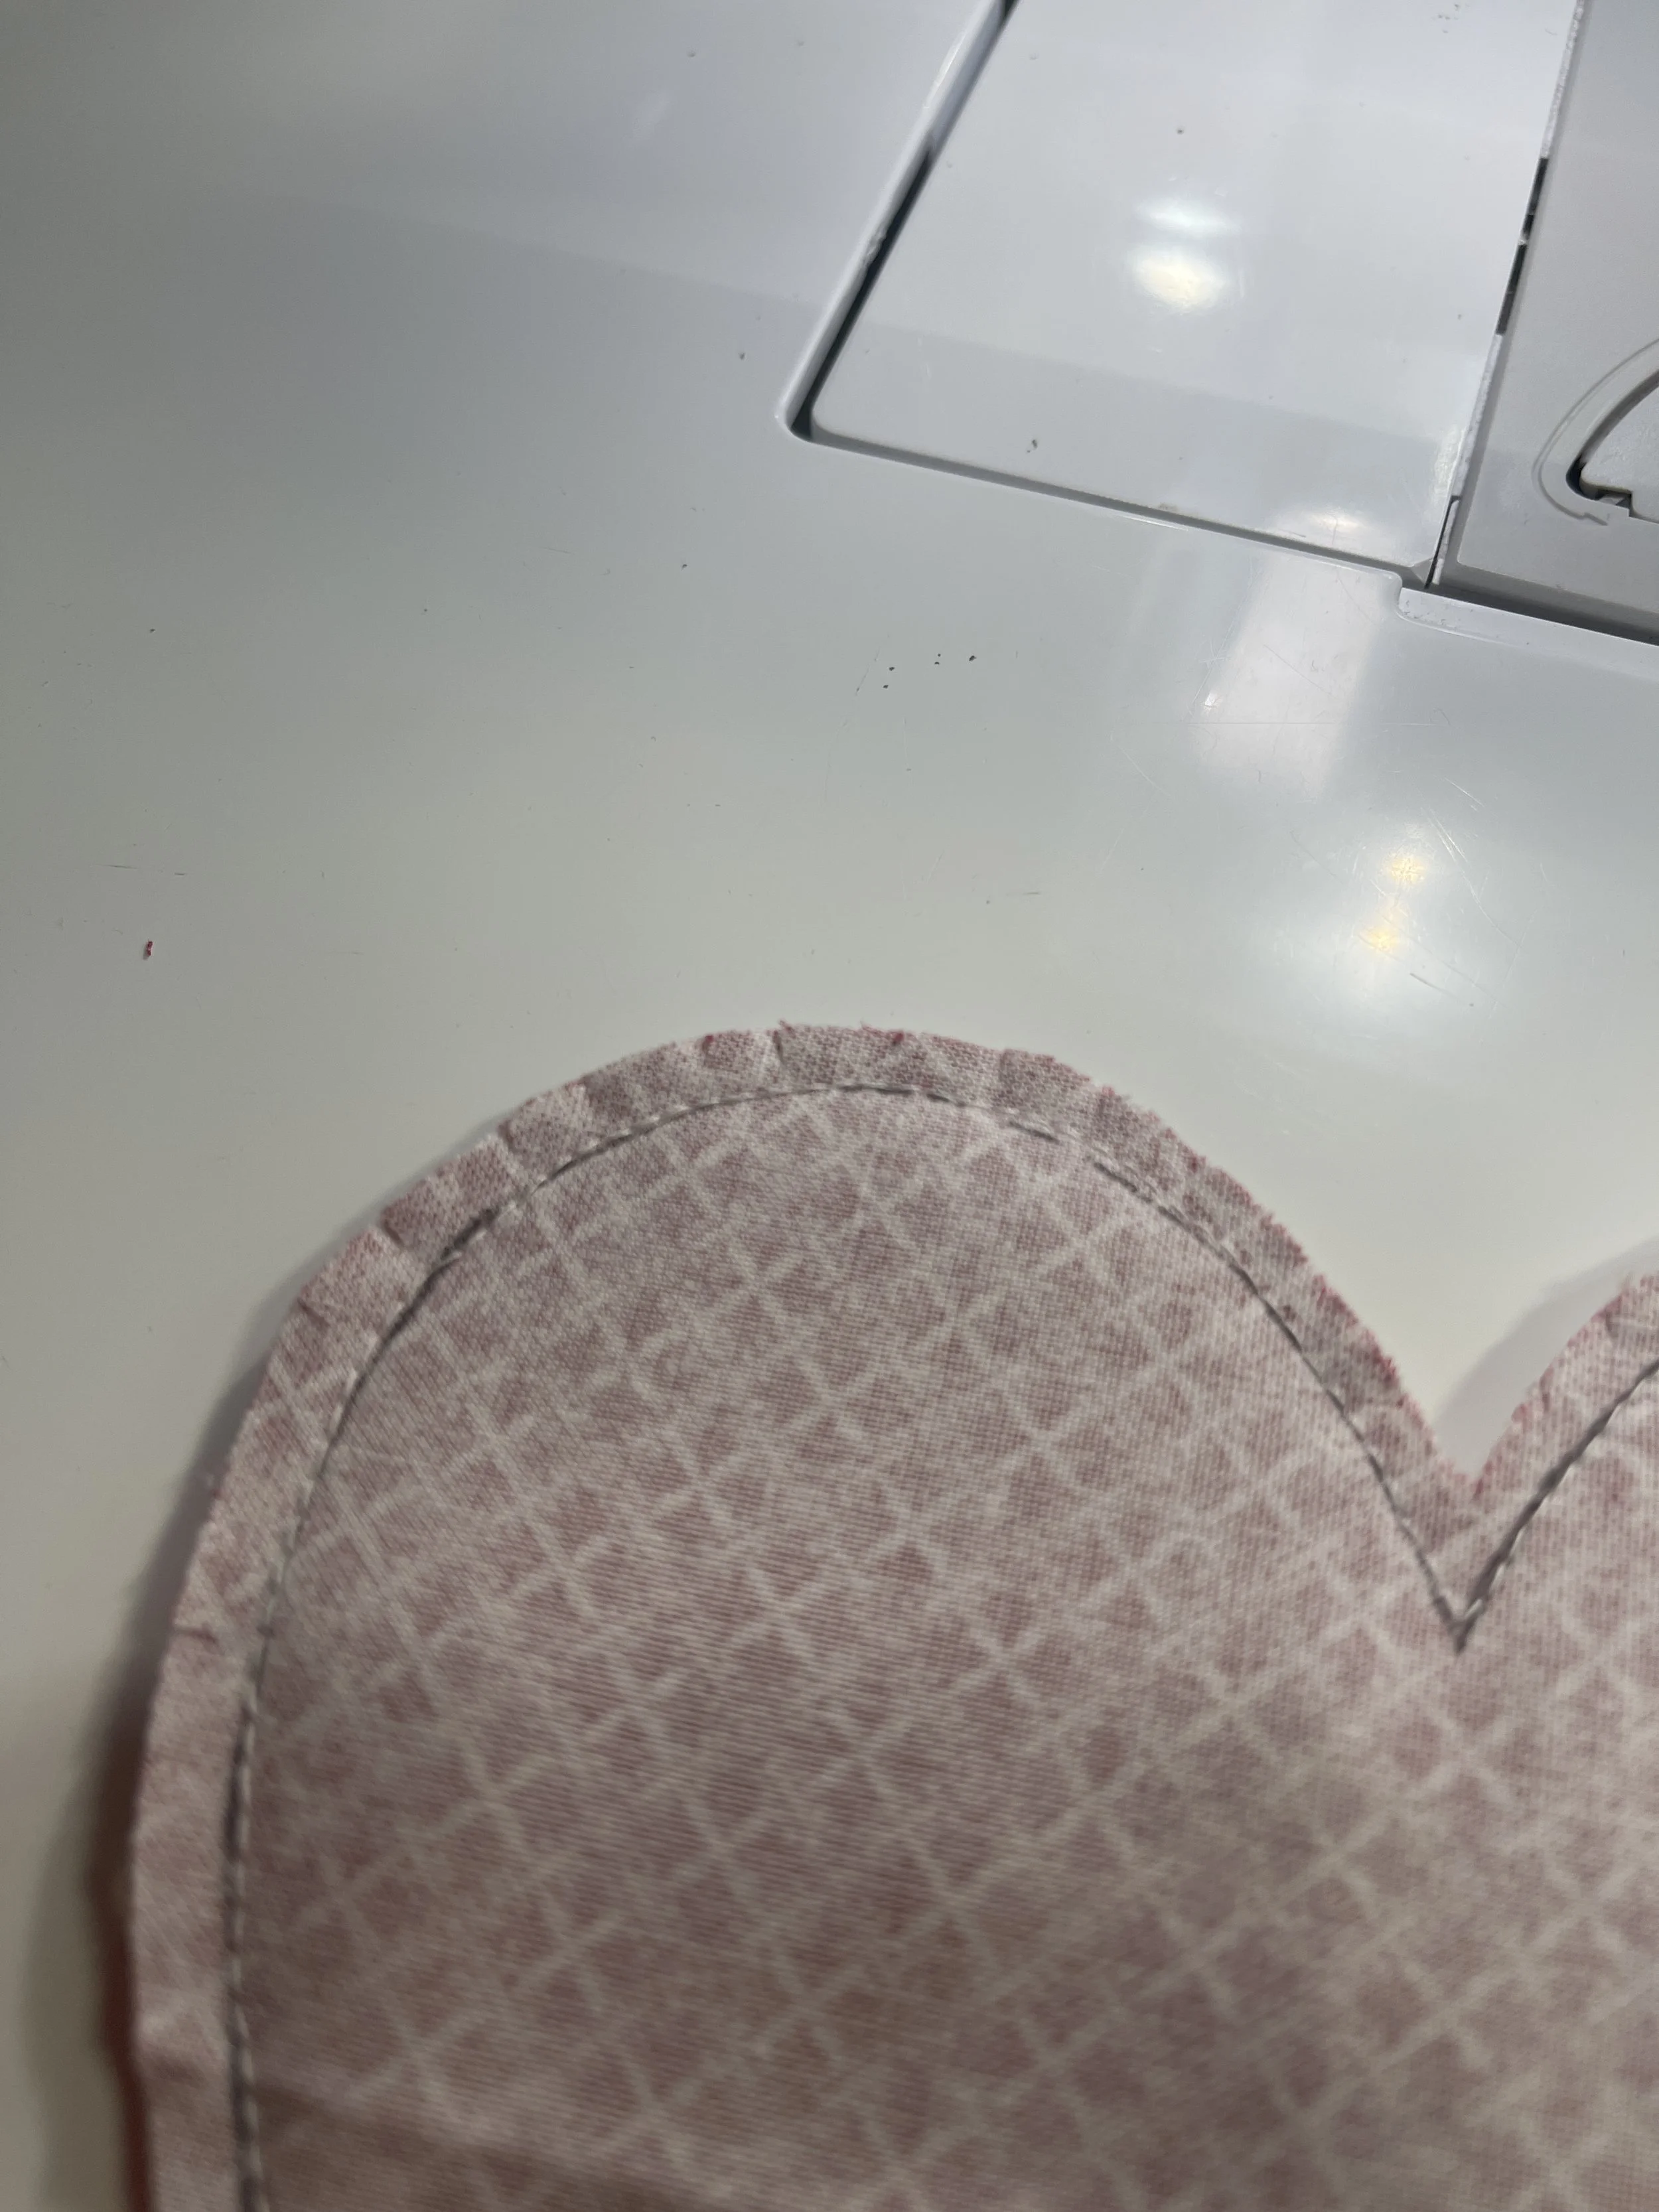
5 With a 2.0-2.5 stitch length, stitch on the drawn heart or ¼” inside the heart if you want a slightly smaller heart, leaving about 2” between where you start and where you stop. (I stitched over the thread in red so you could easily see where I stopped and started) This leaves you a space to turn the heart inside out. Go slowly around the curves and adjust the fabric every few stitches if you need to in order to keep the curve smooth.
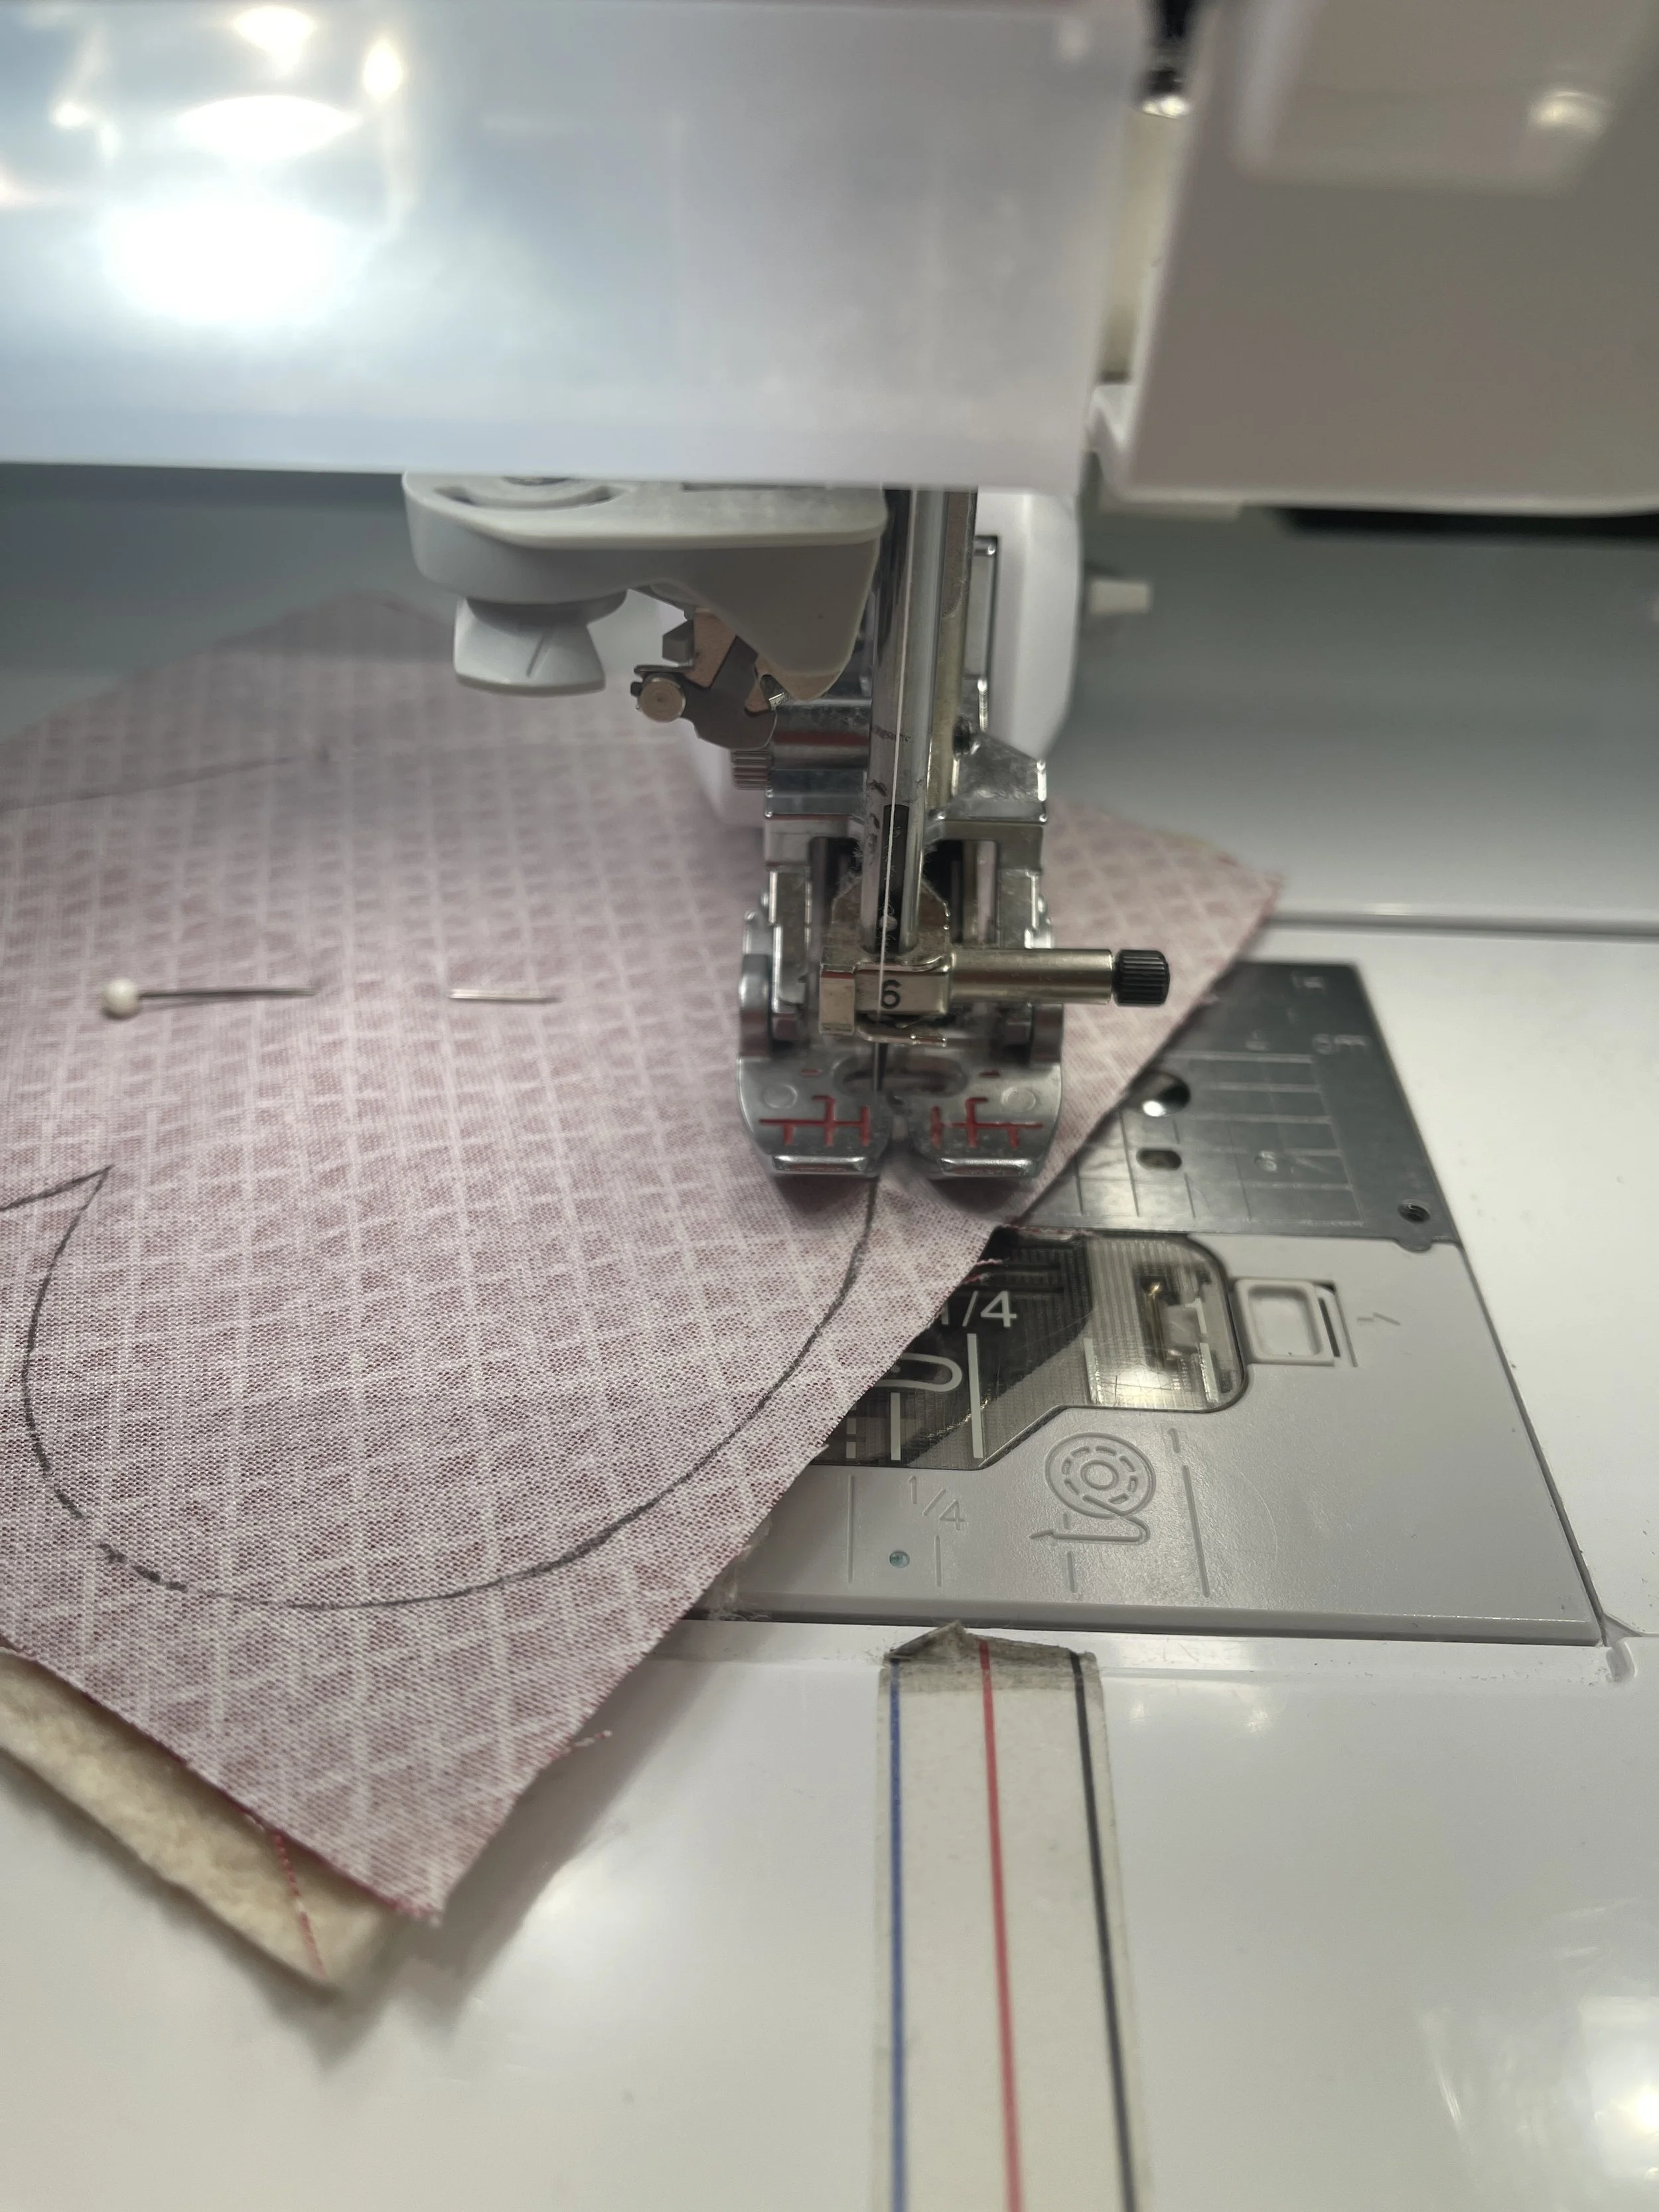
This is sewing directly on the line for a little bit larger heart.

This is sewing about a 1/4” inside the line for a slightly smaller heart.

Leave a gap of about 2 inches between where you stop and start to give you room to turn your heart inside out.
6 Trim about ¼” from the drawn line. Clip around the curves, in the center of the heart, and clip off the end point. Be sure to not cut the stitching line.
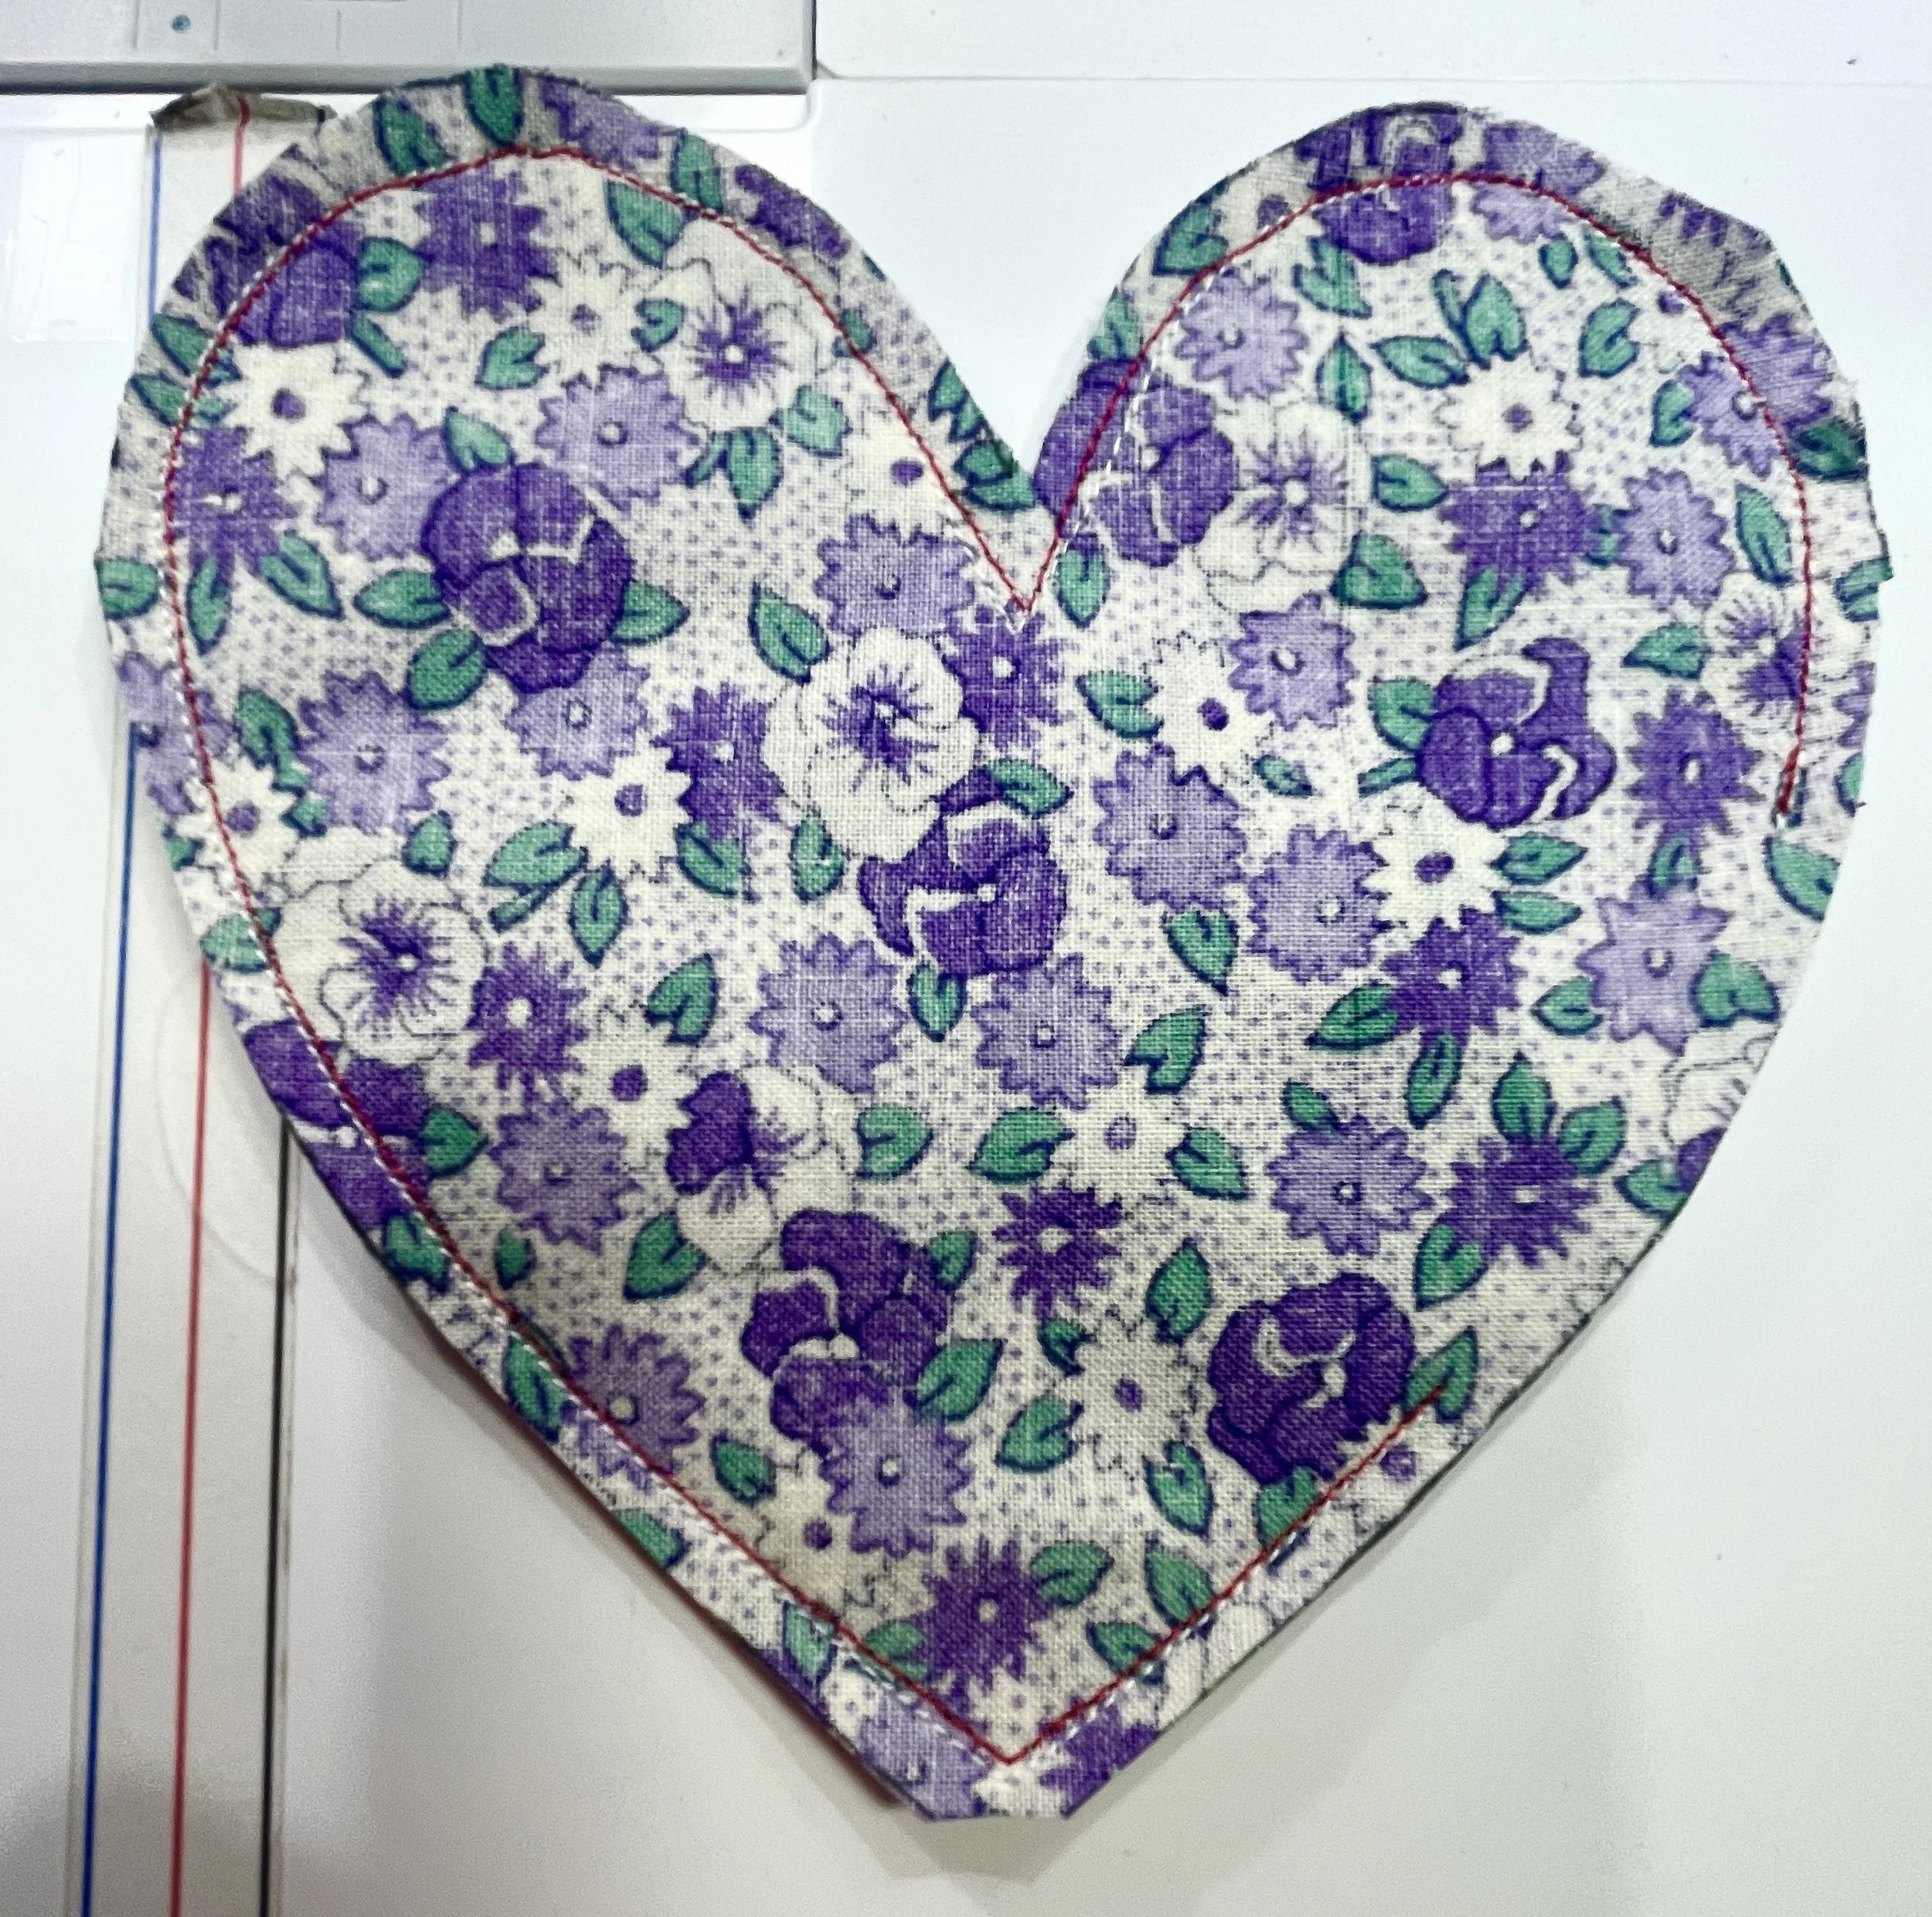
7 Turn the heart inside out. Use your favorite tool to push out all the curves and the point.
8 Press heart. Turn the edges of the hole where you turned the heart to the inside when you press.

You need to close the opening by tucking the edges inside the heart and stitching it closed.
9 Hand stitch the hole closed.
10 Top stitch around the edge of the heart to give it definition. You can do this by hand, or on your machine. Try a decorative stitch or a heavier thread (12 wt) for a different look.
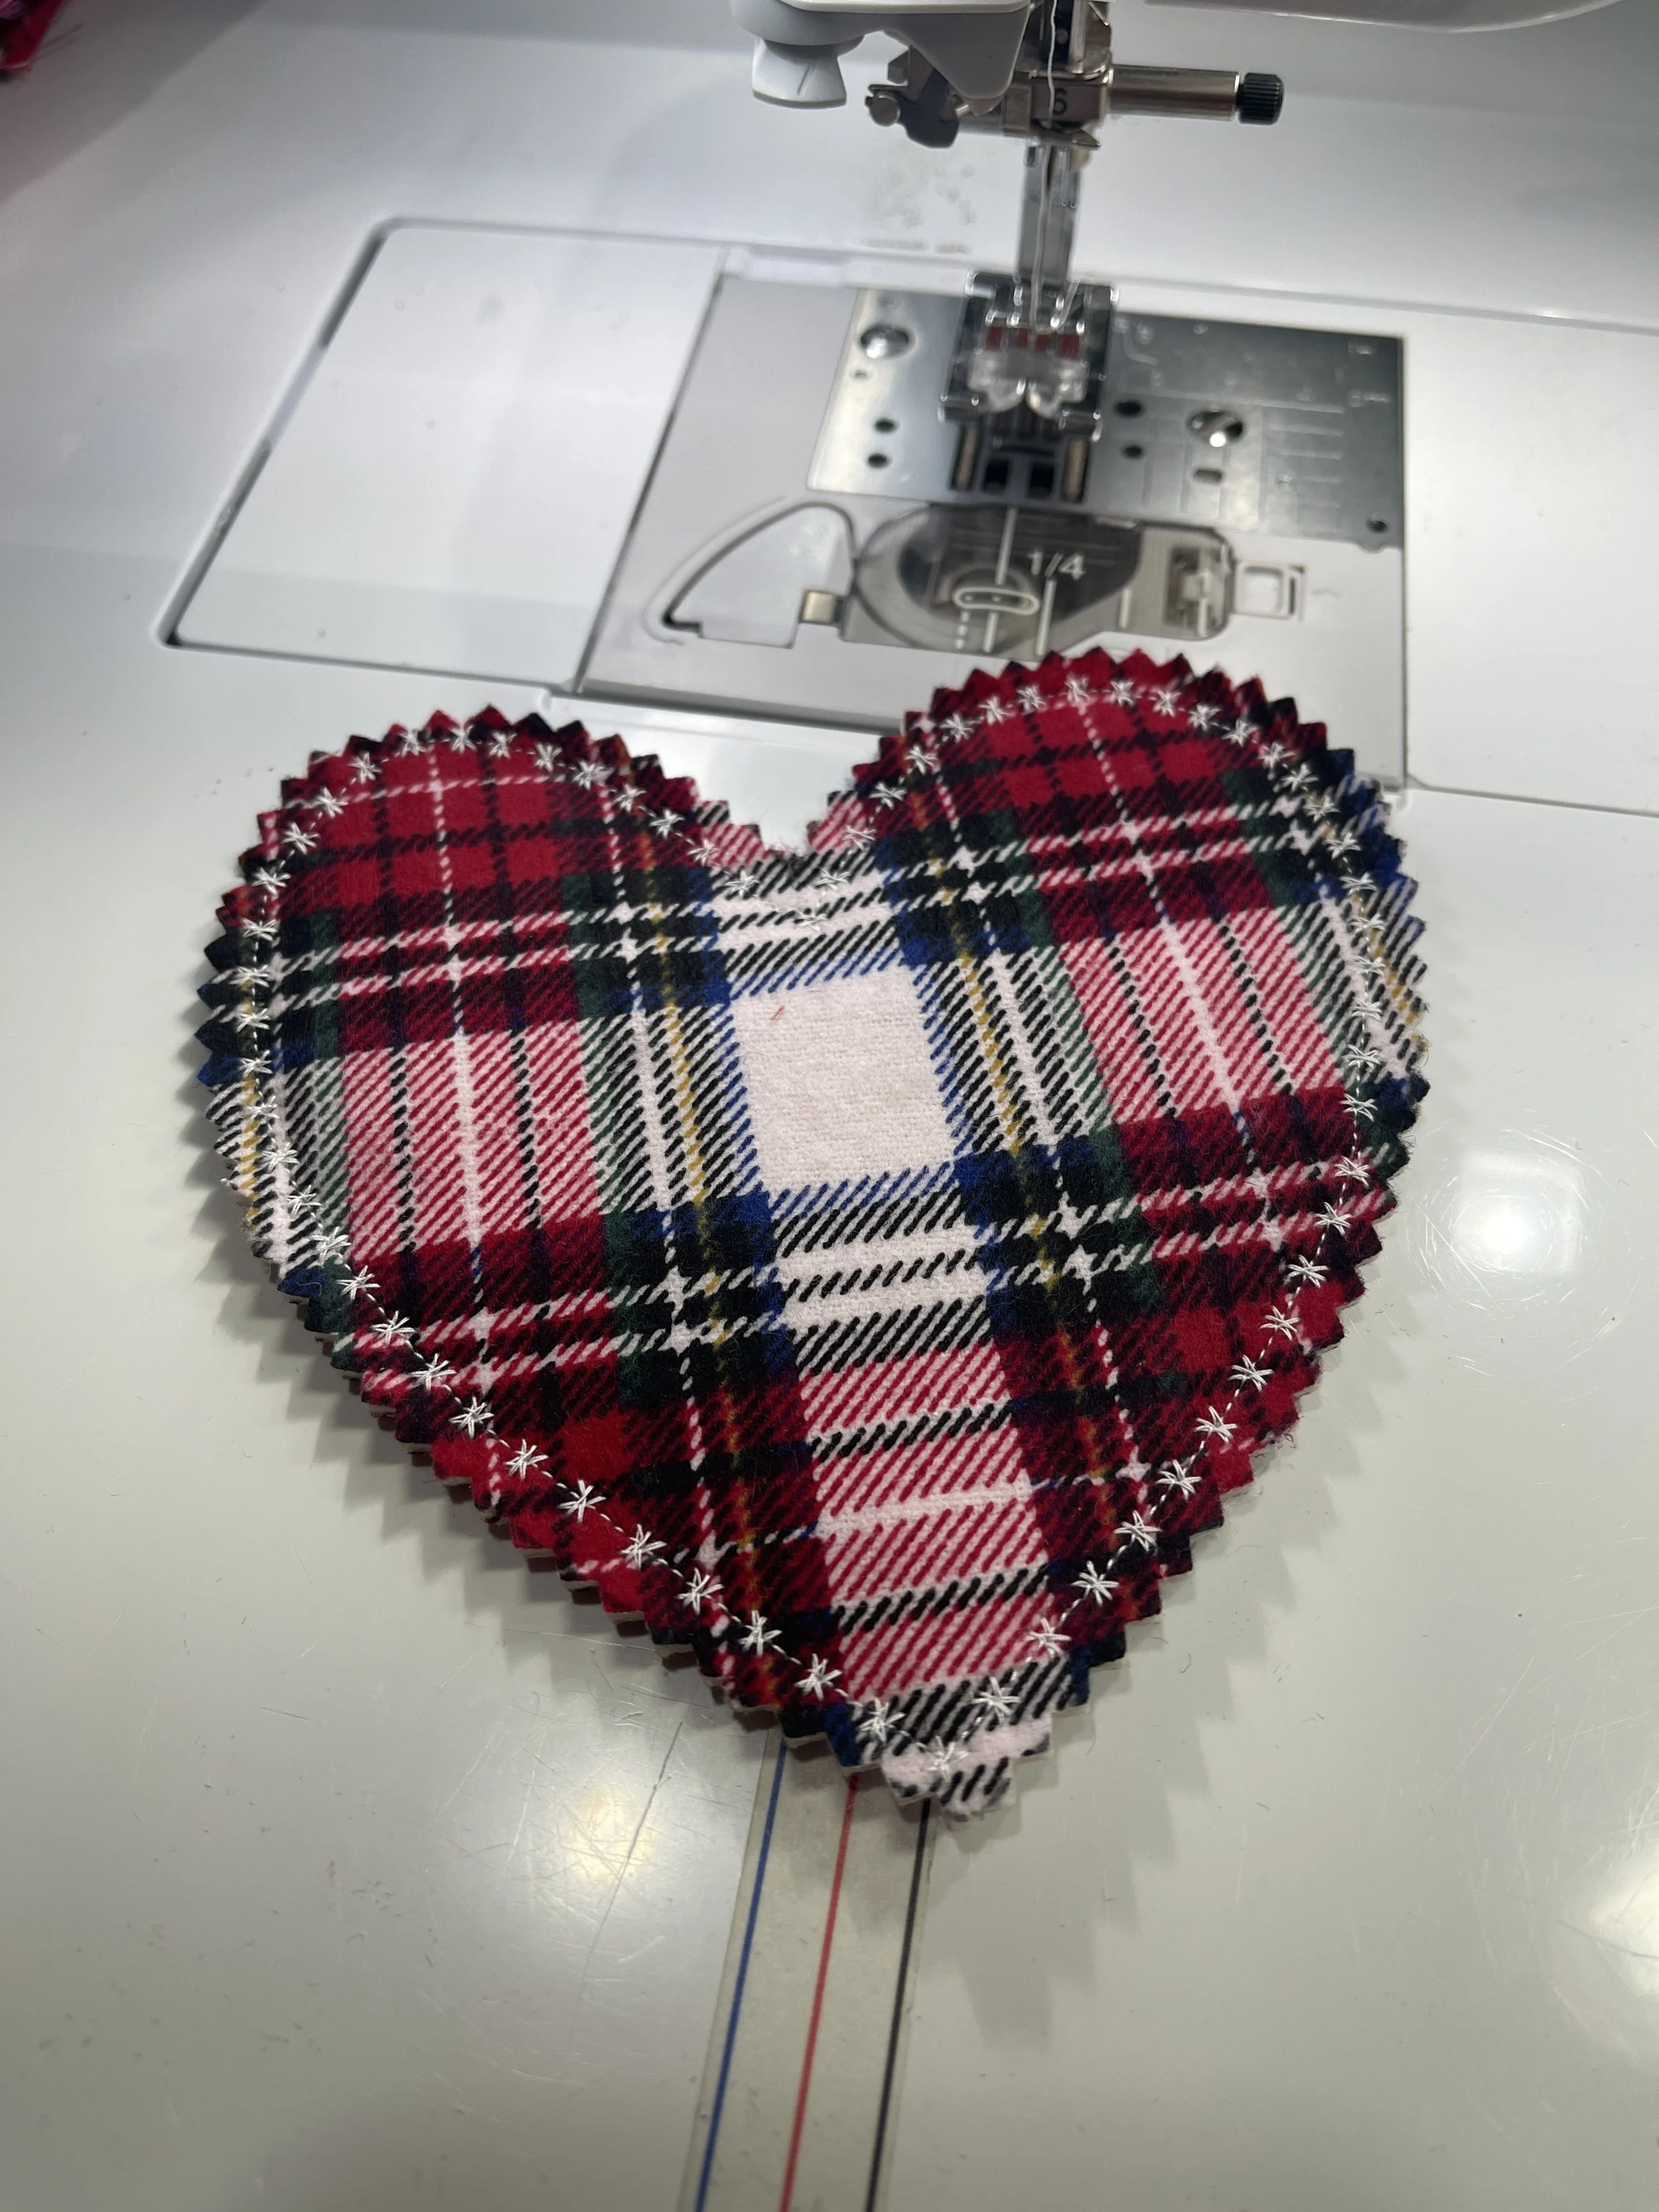
Since this one is made from flannel I put a little snowflake decorative stitch around the edge. You could be very creative with these.
11 Enjoy your mug rug.
Directions for a raw edge heart mug rug:
4 Layer your fabric wrong sides together. If not using a fusible batting or fleece, place that in the middle of the two pieces of fabric. The fabric with the traced heart on it should be facing up.
5 With a 2.0 – 2.5 stitch length, stitch ¼” on the inside of the drawn heart. Go slower around the curves and adjust the fabric every few stitches to keep a smooth curve.
6 Use pinking shears to cut on the drawn line.
7 Enjoy your new mug rug.

Here is the link to the pdf for the heart template. Make sure you print this at 100% so it is almost 6 inches. If you want a smaller heart, then print at a smaller percentage.
Make sure you tell those you love how much you care.
God has a good plan for your life because He loves you. Jeremiah 29:11
Until next time,
Happy quilting